Module 6: Creating a Mobile Layout
To keep an application usable on a small screen, it is important to avoid clutter and only display the information mobile users really need. In this module, you create a new layout that is optimized to work with expenses on a mobile device.
Step 1: Create the Mobile Layout
In Setup mode, select Build > Create > Objects
Click the Expense link
In the Page Layouts section, click the New button
Select Expense Layout in the Existing Page Layout dropdown
Specify Expense Mobile Layout as the Page Layout Name
Click Save
Step 2: Add / Remove Fields
Mouse over the Expense Id field and click the Remove button
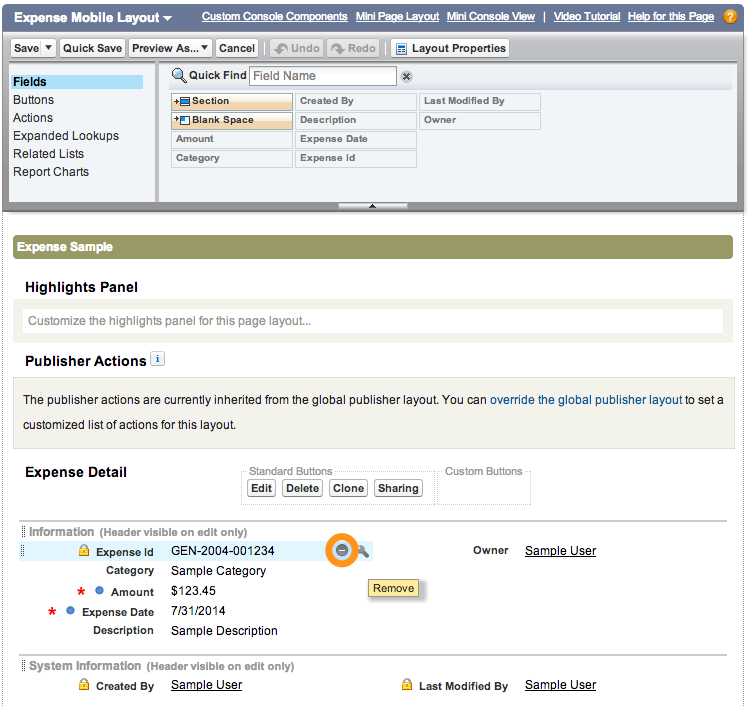
Mouse over the Created By field and click the Remove button
Mouse over the Last Modified By field and click the Remove button
Click the Save button (upper left)
Step 3: Assign the Page Layout to Specific Users
In the Page Layouts section, click the Page Layout Assignment button
Click the Edit Assignment button
Click System Administrator in the list, and select Expense Mobile Layout in the Page Layout To Use dropdown list.
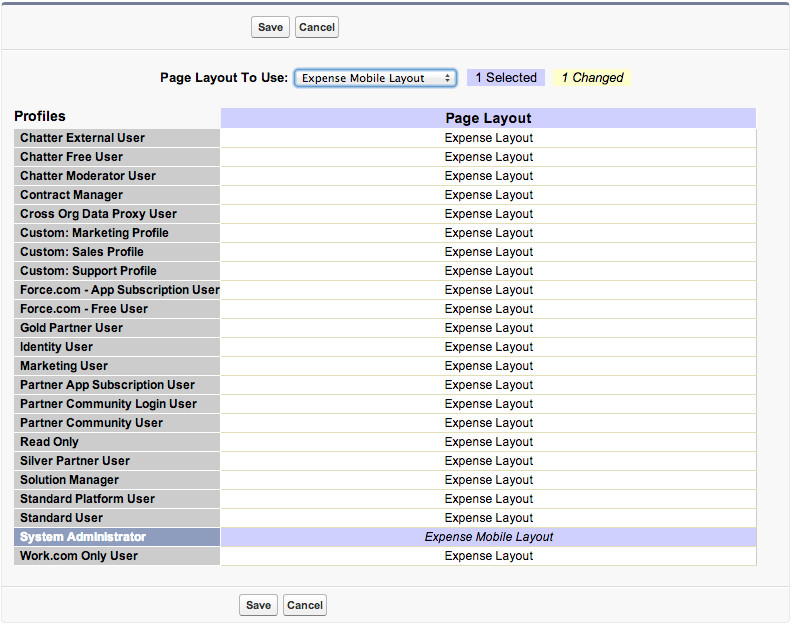
Click Save
Step 4: Test the Application
In the Salesforce1 Mobile App, tap the menu icon
 (upper left corner)
In the menu, tap Expenses under Recent
Tap an expense in the list to see the details
Swipe up to hide the record highlights header
Notice that the Expense Id, Created By, and Last Modified By fields are no longer displayed
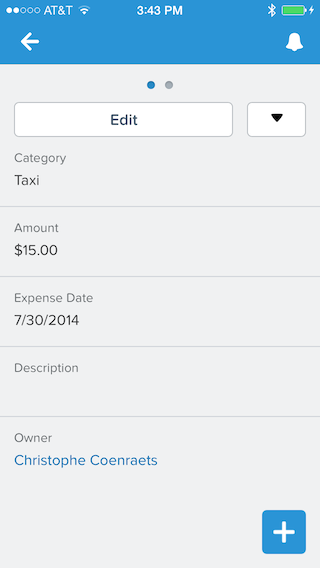
In this case, the difference between the two layouts is minimal. Creating a mobile layout makes a lot of sense for objects with a lot of fields.
- Creating a Developer Edition Account
- Installing the Salesforce1 App
- Creating the Expense Object
- Creating the Expenses Tab
- Entering Expenses in the S1 Mobile App
- Creating a Mobile Layout
- Creating a Compact Layout
- Uploading Receipts using the Chatter Feed
- Creating a Global Action
- Working with Related Objects
- Creating a Child Record with an Object Action
- Updating a Record with an Object Action
- Working with Mobile Cards
- Next Steps