Module 10: Deploying an App on Heroku and Using the Salesforce REST APIs
In this module, you deploy and configure a Node.js application on Heroku: The application uses OAuth to authenticate with Salesforce, and the REST APIs to access Salesforce data.
Step 1: Create a Connected App
In Setup, click Build > Create > Apps
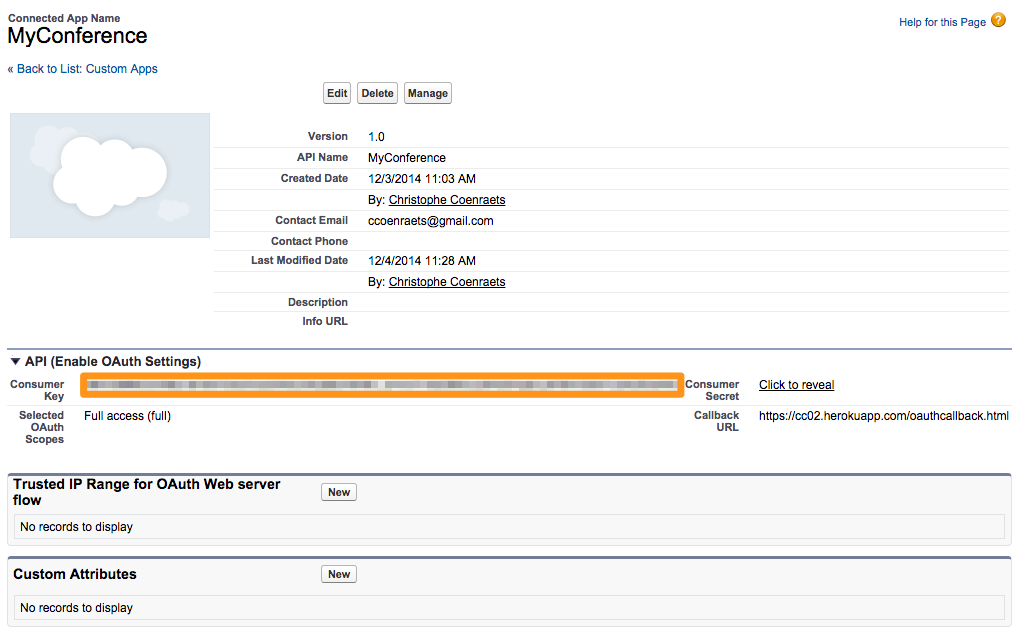
In the Connected Apps section, click New, and define the Connected App as follows:
- Connected App Name: MyConference
- API Name: MyConference
- Contact Email: enter your email address
- Enabled OAuth Settings: Checked
- Callback URL: http://localhost:3000/oauthcallback.html (You'll change this later)
- Selected OAuth Scopes: Full Access (full)

Click Save and Continue.
Step 2: Create a Heroku Account
If you don't already have a Heroku account, follow the steps below to create a free account:
Open a browser and access the following URL: https://signup.heroku.com
Fill in the signup form and click Create Free Account button.
Check your email. You will receive an activation email for your free account.
Click the link in the activation email. Enter your new password information, and click Set password and log in.
Step 3: Familiarize Yourself with the Application
Access https://github.com/ccoenraets/salesforce-conference-demo
Click the client link and then the index.html link to examine the code in client/index.html:
- It doesn't have any HTML markup inside the body tag. The HTML is built dynamically in JavaScript in the app.js file.
- It uses ratchet.css. Ratchet is a simple CSS toolkit that provides styles for mobile applications.
- It uses ForceJS to integrate with Salesforce.
- It makes an Ajax call to the server to get the Connected App Id
Examine the code in client/js/app.js:
- It includes the basic logic to manage a single page application and generate HTML pages on the fly.
- The getSessionList() function is responsible for retrieving the list of sessions from your Salesforce instance.
- The getSessionDetails() function is responsible for retrieving the details of a specific session from your Salesforce instance.
- The showSessionList() function is responsible for generating the HTML for the session list page
- The showSessionDetails() function is responsible for generating the HTML for the session details page
- The router object is responsible for detecting hashtag changes in the URL and loading the corresponding page
Examine the code in client/oauthcallback.html:
At the end of the OAuth workflow, the Salesforce authentication process loads the redirect URI you specified in your Connected App and passes the access token and other OAuth values (server instance, refresh token, etc.) in the query string. oauthcallback.html simply passes that information to the ForceJS library which uses it to make REST API calls to your Salesforce instance.
Examine the code in server.js. server.js implements a small HTTP server that provides two features:
- Web server for static content. The document root for the web server is the client directory.
- Proxy for Salesforce REST requests. Because of the browser’s cross-origin restrictions, your JavaScript application hosted on your own server (or localhost) will not be able to make API calls directly to the *.salesforce.com domain. The solution is to proxy your API calls through your own server.
Step 4: Deploy the Application
In the repository home page, click the Deploy to Heroku button
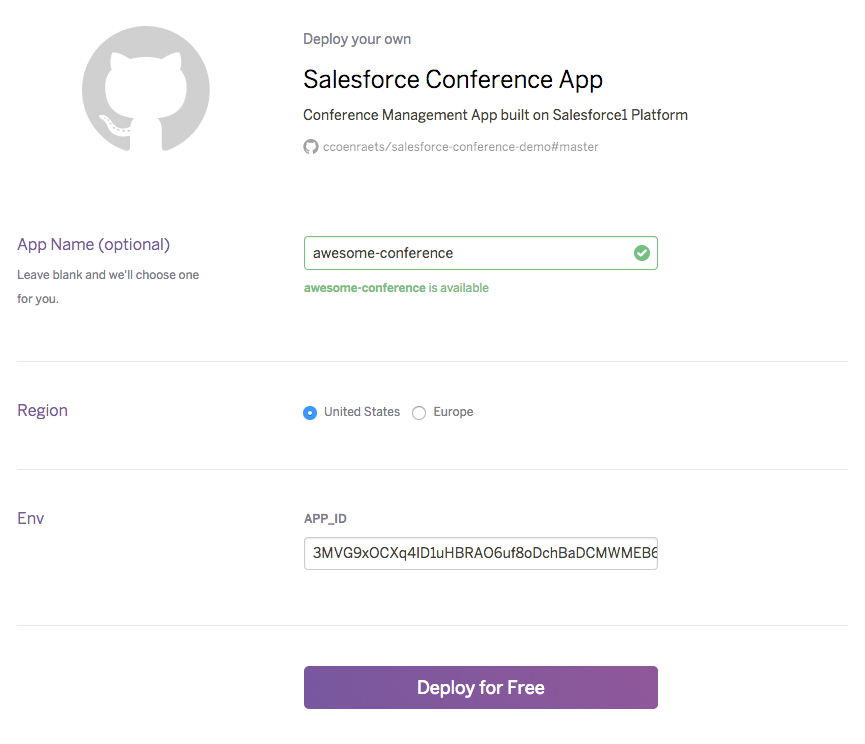
- For App Name, specify a name for your application. For example, if you specify awesome-conference, your application will be available at https://awesome-conference.herokuapp.com. Your app name has to be unique on the herokuapp.com domain, so you may have to try a few names before finding one that's available.
- For APP_ID, paste the consumer key of the connected app you created in step 1.
- Click the Deploy For Free button
In Salesforce, go back to your Connected App (Build > Create > Apps), click Edit next to your Connected App, and adjust the OAuth Callback URL based on your Heroku app name. For example, if you specified awesome-conference as the name of your Heroku application, specify https://awesome-conference.herokuapp.com/oauthcallback.html as the OAuth URL.

Make sure you are using https and replace awesome-conference with your own app name.
Click Save and Continue
Step 5: Test the Application
Open a browser and access your application's URL on Heroku. For example: https://awesome-conference.herokuapp.com
- Make sure you use https
- Replace awesome-conference with your own app name
- Your browser may block the OAuth authentication popup dialog. If that happens, make sure you enable the popup dialog.
- If you get an error message (error=redirecturimismatch&errordescription=redirecturi%20must%20match%20configuration) in the popup dialog, wait for a few minutes and try again: the changes you made to the OAuth callback URL in the previous step take a few minutes to become available.
Login with your Developer Edition credentials
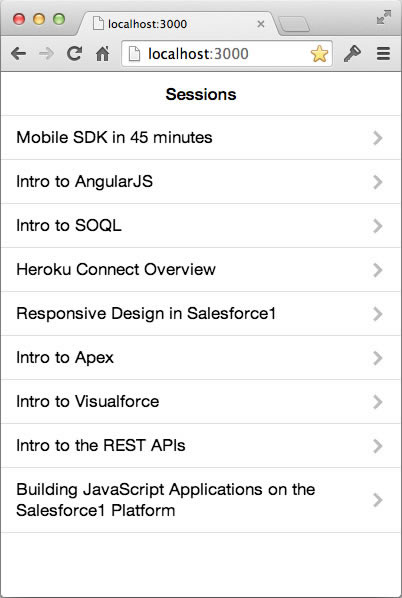
You should now see the list of sessions
Click a session to see the details
This is just the starting point for building a custom application written in JavaScript, authenticating with Salesforce using OAuth, and accessing Salesforce data using the REST APIs. If you are planning on building a real-life application based on this architecture, consider using a JavaScript framework such as Backbone.js or AngularJS with Ionic.
Extra Credit: Running Your Own Node.js Server
Follow these instructions.