In this module, you enhance the Visualforce page you built in module 7: you create a controller extension that allows users to upload speaker pictures.
In this step, you add two fields to the Speaker object: Picture_Path to store the location of the picture on the server, and Picture, a Formula field used to display the image in the Visualforce page.
In Setup, select Build > Create > Objects, and click the Speaker link
In the Custom Fields & Relationships section, click New, and create a Picture_Path field defined as follows:
Click Next, Next, Save & New
Create a Picture field defined as follows:
Formula: IMAGE(Picture_Path__c, '')
Make sure you use two single quotes and NOT a double quote.
Click Next, Next, Save
In the Developer Console, select File > New > Apex Class, specify SpeakerControllerExtension as the class name and click OK
Implement the class as follows:
public class SpeakerControllerExtension {

    public blob picture { get; set; }
    public String errorMessage { get; set; }

    private final Speaker__c speaker;
    private ApexPages.StandardController stdController;

    public SpeakerControllerExtension(ApexPages.StandardController stdController) {
        this.speaker = (Speaker__c)stdController.getRecord();
        this.stdController = stdController;
    }

    public PageReference save() {
        errorMessage = '';
        try {
            upsert speaker;
            if (picture != null) {
                Attachment attachment = new Attachment();
                attachment.body = picture;
                attachment.name = 'speaker_' + speaker.id + '.jpg';
                attachment.parentid = speaker.id;
                attachment.ContentType = 'application/jpg';
                insert attachment;
                speaker.Picture_Path__c = '/servlet/servlet.FileDownload?file='
                                          + attachment.id;
                update speaker;
            }
            return new ApexPages.StandardController(speaker).view();
        } catch(System.Exception ex) {
            errorMessage = ex.getMessage();
            return null;
        }
    }
}
The save() method overrides the standard controller's default behavior.
Save the file
In the Developer Console, open the SpeakerForm page, and add the controller extension to the page definition:
<apex:page standardController="Speaker__c" extensions="SpeakerControllerExtension">
Add an inputFile (right after the Email inputField):
<apex:inputFile value="{!picture}" accept="image/*" />
Make sure you use an inputFile and not an inputField
Display the potential errorMessage right after </apex:pageBlock>
{!errorMessage}
Save the file
Click the Speakers tab
Click New to add a speaker
Enter the speaker first name, last name and email
Click the Choose File button and select a jpg file on your file system
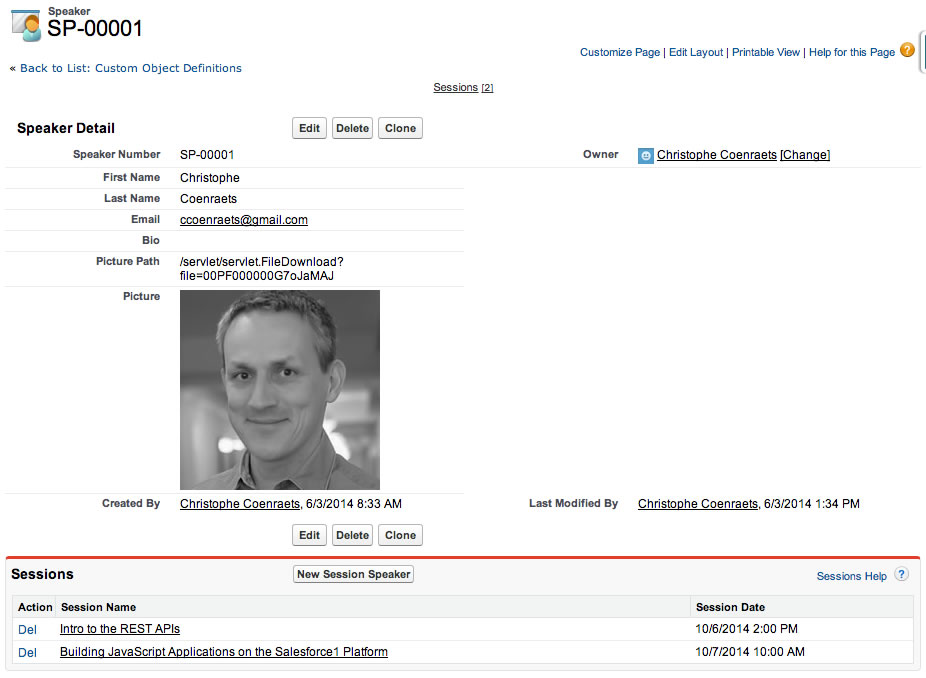
Click the Save button: you should see the image on the speaker's details page