In this module, you create Tabs to provide access to the Session and Speaker objects. You group these tabs together in an Application to make them easier to access. Finally, you optimize Page Layouts to show relevant information in the Speaker and Session lists.
To create the Sessions tab:
In Setup mode, select Build > Create > Tabs
In the Custom Object Tabs section, click New
Select Session as the Object, click the magnifier icon next to Tab Style and select the Books icon
Click Next, Next
Uncheck the Include Tab checkbox to ensure the Sessions tab doesn't appear in any of the existing applications, and click Save (In step 2, we will add the Sessions tab to a new application).
To create the Speakers tab:
In the Custom Object Tabs section, click New
Select Speaker as the Object, click the magnifier icon next to Tab Style and select the Presenter icon
Click Next, Next
Uncheck the Include Tab checkbox to ensure the Speakers tab doesn't appear in any of the existing applications, and click Save
A Salesforce App is a group of Tabs that makes it easy for users to access a set of related features.
In Setup mode, select Build > Create > Apps
In the Apps section, click New
Check Custom app and click Next
Enter Conference for both the App Label and App Name, and click Next
Accept the default App Logo and click Next
Add the Sessions and Speakers tabs to the Selected Tabs and click Next
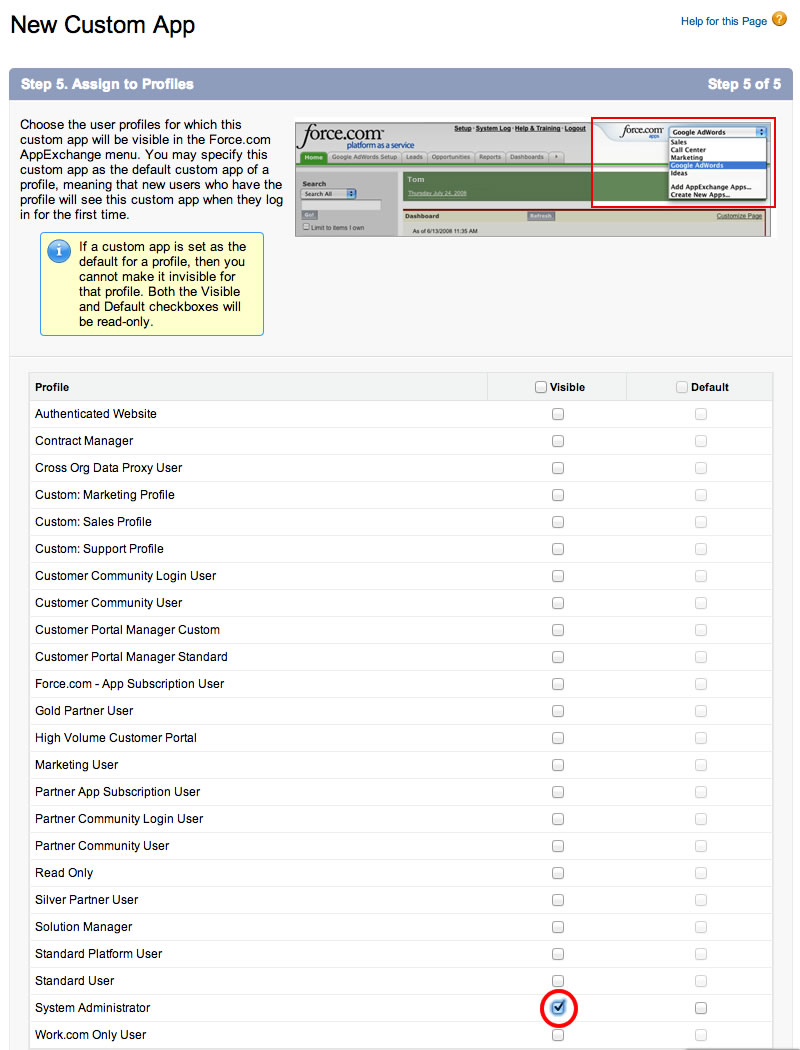
Check the Visible checkbox for System Administrator and click Save
Select Conference in the App selector (upper right corner of the screen)
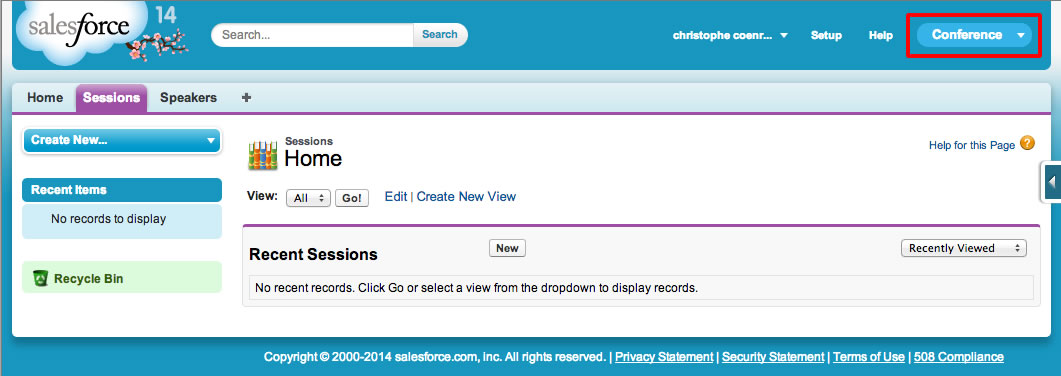
If the Conference App doesn't appear in the App Selector, you probably forgot to assign it to the System Administrator profile. In Setup, select Build > Create > App, click Edit next to Conference, check the System Administrator profile, and click Save.
Click the Speakers Tab, click New, and add a few sample speakers
Click the Sessions Tab, click New, and add a few sample sessions
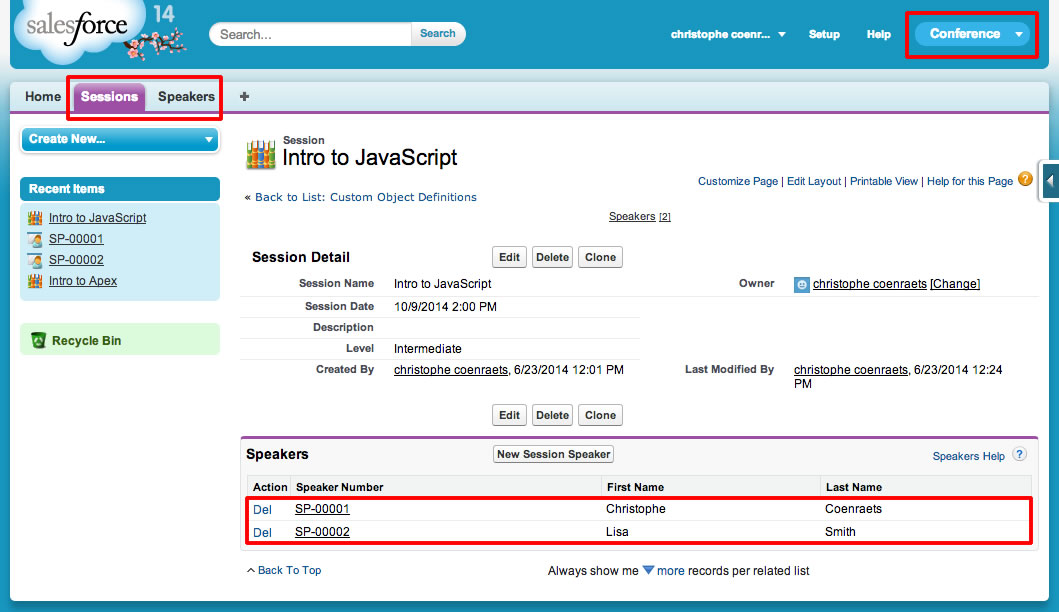
To assign speakers to a session:
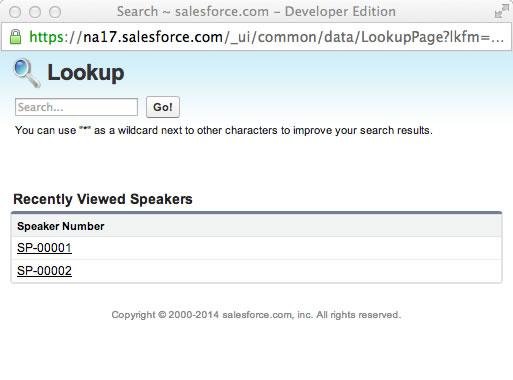
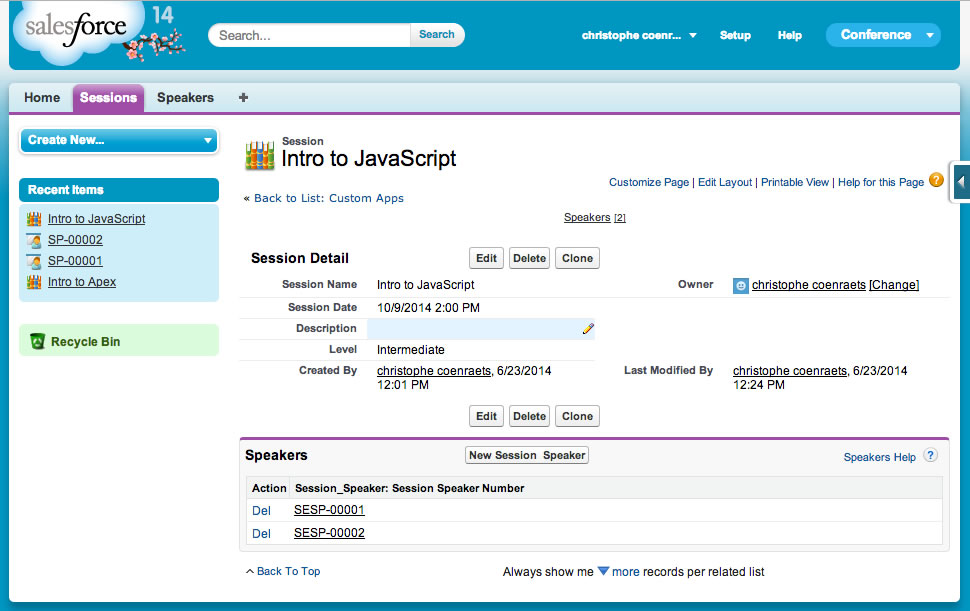
Notice that the speaker lists in both the speaker lookup dialog and the session details page don't provide very informative data at this time. We will fix this in the next steps.
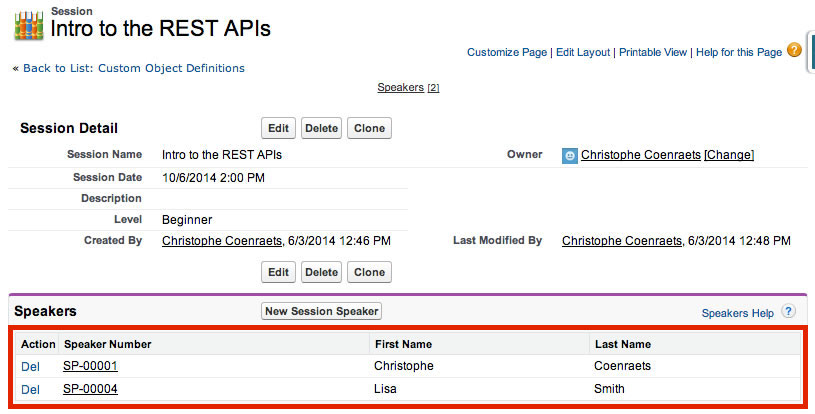
In this step, you optimize the Session details screen: to allow the user to easily identify the speakers for a session, you add the appropriate fields to the Speaker list.
In Setup mode, select Build > Create > Objects
Click the Session link
In the Page Layouts section, click Edit next to Session Layout
In the Related Lists section, click the wrench icon (Related list properties)
Add the following fields to the Selected Fields:
Remove the following field from the Selected Fields:
Click OK
Click Save (upper left corner)
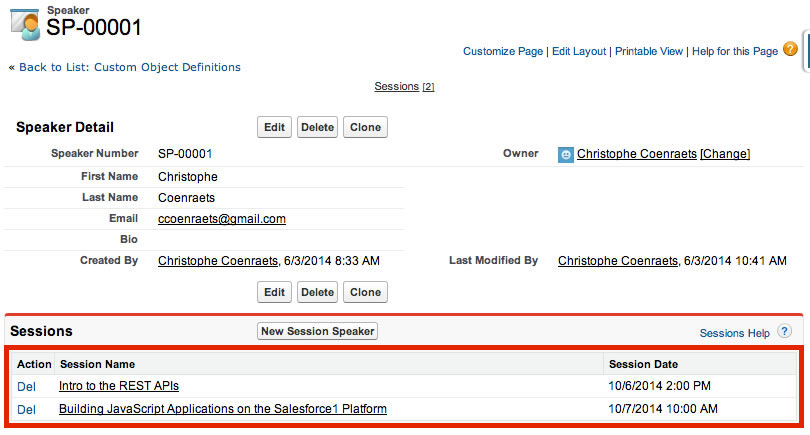
In this step, you optimize the Speaker details screen: to allow the user to easily identify the sessions for a speaker, you add the appropriate fields to the Session list.
In Setup mode, select Build > Create > Objects
Click the Speaker link
In the Page Layouts section, click Edit next to Speaker Layout
In the Related Lists section, click the wrench icon (Related list properties)
Add the following fields to the Selected Fields:
Remove the following field from the Selected Fields:
Click OK
Click Save (upper left corner)
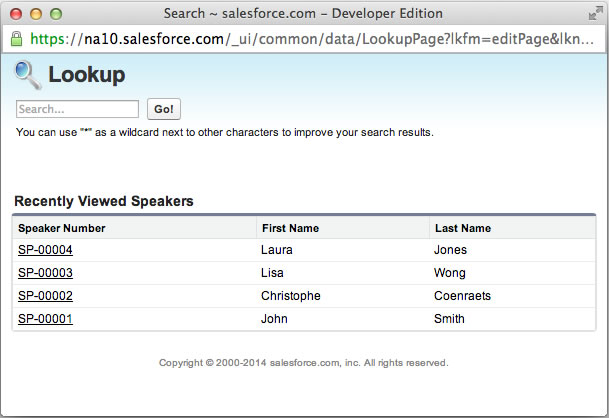
In this step, you optimize the Speaker lookup dialog to allow the user to easily identify speakers.
In Setup mode, select Build > Create > Objects
Click the Speaker link
Scroll down to the Search Layouts section, and click Edit next to Lookup Dialogs
Add First Name and Last Name to the Selected Fields
Click Save
Click the Sessions tab, select a session and make sure the speaker list shows the speaker number, first name, and last name
Assign a new speaker to a session and make sure the speaker lookup dialog shows the speaker first name and last name
Click the Speakers tab, select a speaker and make sure the session list shows the session name and date
If the lists don't show the expected fields, you probably forgot to click the Save button in the Page Layout screen. Go back to steps 4 and 5, and make sure you click Save at the end.