In this module, you create an application that runs outside your Salesforce instance: it uses OAuth to authenticate with Salesforce, and the REST APIs to access Salesforce data.
You need Node.js to perform the exercises in this module. If you don't already have Node.js installed on your system, you can install it here.
This module is recommended but optional. If you are not interested in building custom applications (applications hosted outside your Salesforce instance), you can move to Module 11.
In Setup, click Build > Create > Apps
In the Connected Apps section, click New, and define the Connected App as follows:

Click Save.
Download and unzip this file, or clone this repository
Using your favorite code editor, examine the code in client/index.html:
Using your favorite code editor, examine the code in client/oauthcallback.html:
At the end of the OAuth workflow, the Salesforce authentication process loads the redirect URI you specified in your Connected App and passes the access token and other OAuth values (server instance, refresh token, etc.) in the query string. Your redirect URI page simply needs to parse the query string, extract the access token and the other OAuth values, and pass that information back to your application by invoking the oauthCallback() function you will code in Step 4.
Using your favorite code editor, examine the code in server.js. server.js implements a small HTTP server that provides two features:
Open Terminal (Mac) or a Command prompt (Windows)
Navigate (cd) to the salesforce-developer-workshop (or salesforce-developer-workshop-master) directory
Install the Node.js server dependencies:
npm install
Start the server:
node server
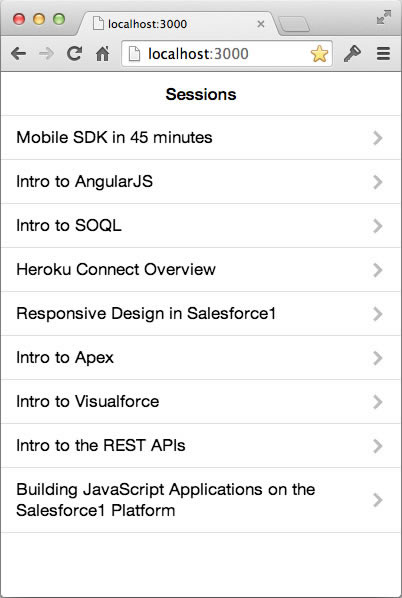
Test the application. Open a browser and access the following URL:
http://localhost:3000
Since we didn't authenticate with Salesforce yet, all you should see at this point is an empty list of sessions.
Using your favorite code editor, open app.js in salesforce-developer-workshop/client/js
Declare the following variables:
var apiVersion = 'v30.0',
clientId = 'YOUR_CONSUMER_KEY',
loginUrl = 'https://login.salesforce.com/',
redirectURI = 'http://localhost:3000/oauthcallback.html',
proxyURL = 'http://localhost:3000/proxy/',
client = new forcetk.Client(clientId, loginUrl, proxyURL);
In Setup (back in Salesforce), click Build > Create > Apps. In the Connected Apps section, click MyConference, and copy the Consumer Key to your clipboard.
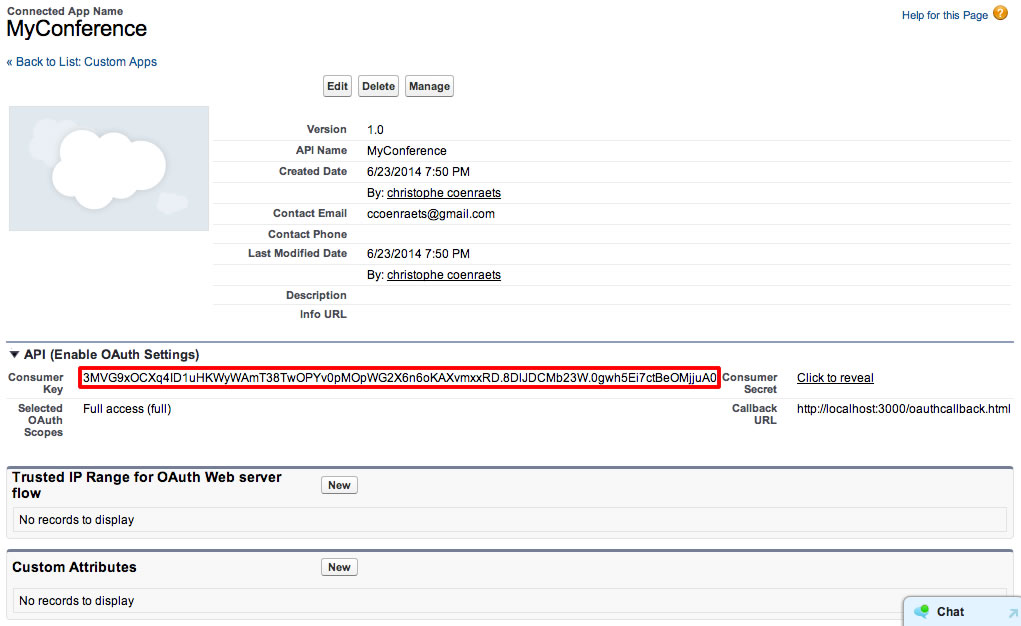
In app.js, replace YOUR_CONSUMER_KEY with the consumer key you copied to your clipboard
In app.js, declare a function named login() implemented as follows (right after the variable declarations):
function login() {
    var url = loginUrl + 'services/oauth2/authorize?display=popup&response_type=token'
                + '&client_id=' + encodeURIComponent(clientId)
                + '&redirect_uri=' + encodeURIComponent(redirectURI);
    window.open(url);
}
Declare a function named oauthCallback() implemented as follows (right after the login() function):
function oauthCallback(response) {
    if (response && response.access_token) {
        client.setSessionToken(response.access_token,
                               apiVersion,
                               response.instance_url);
        console.log('OAuth authentication succeeded');
    } else {
        alert("AuthenticationError: No Token");
    }
}
oauthCallback() is called by the oauthcallback.html page at the end of the OAuth workflow (see oauthcallback.html in step 2 for details).
Invoke the login() function as the last line of the app.js file:
login();
Test the application
It may take a few minutes for a Connected App to be available after you create it. If you get this message: error=invalidclientid&error_description=client%20identifier%20invalid, wait a few minutes and try again.
In app.js, declare a function named getSessions() implemented as follows (right after the oauthCallback() function):
function getSessions() {
    var soql = "SELECT Id, Name, Session_Date__c FROM Session__c",
        html = '';
    client.query(soql,
        function (data) {
            var sessions = data.records;
            for (var i=0; i<sessions.length; i++) {
                html += '<li class="table-view-cell">' + sessions[i].Name + '</li>';
            }
            $('.session-list').html(html);
        },
        function (error) {
            alert("Error: " + JSON.stringify(error));
        });
    return false;
}
Modify the oauthCallback() function to invoke getSessions() when the user has been successfully authenticated.
console.log('OAuth authentication succeeded');
getSessions();
Test the application
This is just the starting point for building a custom application written in JavaScript, authenticating with Salesforce using OAuth, and accessing Salesforce data using the REST APIs. If you are planning on building a real-life application based on this architecture, consider using a JavaScript framework such as Backbone.js or AngularJS with Ionic.