In this module, you create a Lightning event used by AccountList to notify AccountMap that the list of accounts is available. In response to this event, AccountMap adds a marker to the map for each account in the list.
In the Developer Console, click File > New > Lightning Event. Specify AccountsLoaded as the bundle name and click Submit.
Implement the event as follows:
<aura:event type="APPLICATION">
    <aura:attribute name="accounts" Type="Account[]"/>
</aura:event>
Click File > Save to save the file.
In the developer console, go back to the AccountList component.
Click CONTROLLER (upper right corner in the code editor)
In doInit, add the logic to fire the AccountsLoaded event in the action callback function:
({
    doInit : function(component, event) {
        var action = component.get("c.findAll");
        action.setCallback(this, function(a) {
            component.set("v.accounts", a.getReturnValue());
            var event = $A.get("e.c:AccountsLoaded");
            event.setParams({"accounts": a.getReturnValue()});
            event.fire();
        });
        $A.enqueueAction(action);
    }
})
Click File > Save to save the controller.
In the developer console, go back to the AccountMap component
Add the following event registration declaration immediately after the map attribute declaration:
<aura:handler event="c:AccountsLoaded" action="{!c.accountsLoaded}"/>
Click File > Save to save the component.
Click CONTROLLER (upper right corner in the code editor), and define a new accountsLoaded function positioned right after the jsLoaded function and implemented as follows:
Make sure you add a comma after the jsLoaded function block.
accountsLoaded: function(component, event, helper) {

    // Add markers
    var map = component.get('v.map');
    var accounts = event.getParam('accounts');
    for (var i=0; i<accounts.length; i++) {
        var account = accounts[i];
        var latLng = [account.Location__Latitude__s, account.Location__Longitude__s];
        L.marker(latLng, {account: account}).addTo(map);
    }
}
Click File > Save to save the controller.
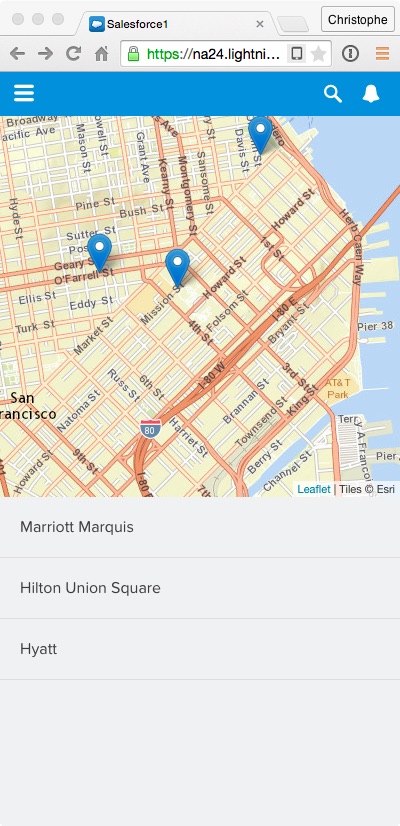
Go back to the Salesforce1 app and reload Account Locator from the menu to see the changes: