In this module, you create the AccountList component responsible for displaying the list of accounts. You also create the AccountListItem component that you nest inside AccountList to render individual accounts in the list.
In the Developer Console, click File > New > Lightning Component. Specify AccountListItem as the bundle name and click Submit.
Implement the component as follows:
<aura:component>

    <aura:attribute name="account" type="Account"/>

    <li><a>{!v.account.Name}</a></li>

</aura:component>
account attribute is defined to hold the account the list item is responsible for displaying. The value of the account attribute will be provided by the AccountList component you create in step 2.<li> element.{!v.account.Name} is the Lightning data binding notation to render the account name inside the <li> tag.<a> tag that wraps the account name makes the account selectable. You'll hook that up in part 8.Click File > Save to save the component.
Click STYLE (upper right corner) and implement the component styles as follows:
.THIS {
    border-bottom: solid 1px #DDDDDD;
}

.THIS a {
    display: block;
    padding: 20px;
    color: inherit;
}

.THIS a:active {
    background-color: #E8F4FB;
}
.THIS refers to the root level <li> tag..THIS a refers to the anchor tags within the component.:active CSS pseudo-class sets a different background when the list item is selected in order to highlight the selection.Click File > Save to save the styles.
In the Developer Console, click File > New > Lightning Component. Specify AccountList as the bundle name and click Submit.
Implement the component as follows:
<aura:component controller="AccountController">

    <aura:attribute name="accounts" type="Account[]"/>
    <aura:handler name="init" value="{!this}" action="{!c.doInit}" />

    <ul>
        <aura:iteration items="{!v.accounts}" var="account">
            <c:AccountListItem account="{!account}"/>
        </aura:iteration>
    </ul>

</aura:component>
accounts attribute is defined to hold the list of Account objects returned by the server.init handler is defined to execute some code when the component is initialized. doInit is defined in the component's client-side controller (you'll implement the controller in the following steps).<aura:iteration> is used to iterate through the list of accounts and create an instance of AccountListItem for each account.Click File > Save to save the component.
Click CONTROLLER, and implement the Controller as follows:
({
    doInit : function(component, event) {
        var action = component.get("c.findAll");
        action.setCallback(this, function(a) {
            component.set("v.accounts", a.getReturnValue());
        });
        $A.enqueueAction(action);
    }
})
doInit(). This is the function the component calls when it is initialized.findAll() method in the component's server-side controller (AccountController), and store it in the action variable.accounts attribute.$A.enqueueAction(action) sends the request the server. More precisely, it adds the call to the queue of asynchronous server calls. That queue is an optimization feature of Lightning.Click File > Save to save the controller.
Click STYLE (upper right corner) and implement the component styles as follows:
.THIS {
    list-style-type: none;
    padding: 0;
    margin: 0;
    background: #FFFFFF;
    height: 100%;
}
.THIS refers to the root level <ul> tag.list-style-type: none is used to remove the standard item bullets.Click File > Save to save the styles.
In the developer console, go back to the AccountLocator component.
If you don't see the tab in the developer console, click File > Open Lightning Resources in the Developer Console menu, select AccountLocator > COMPONENT in the dialog, and click the Open Selected button.
Replace the AccountList placeholder with the actual component:
<aura:component implements="force:appHostable">

    <div>
        <div>
            AccountMap goes here
        </div>
        <div>
            <c:AccountList />
        </div>
    </div>

</aura:component>
Click File > Save to save the component.
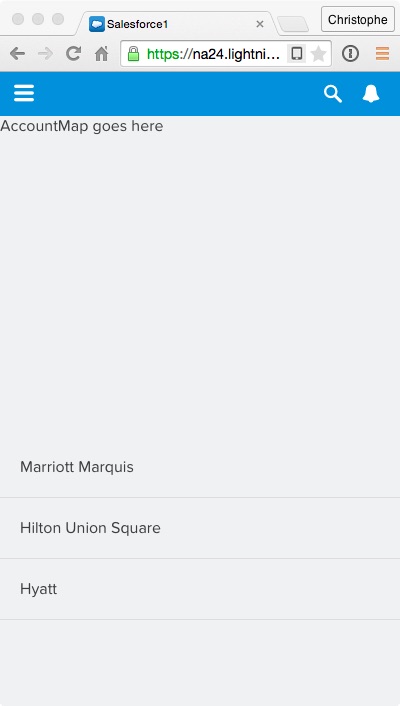
Go back to the Salesforce1 app and reload Account Locator from the menu to see the changes: