In this module, you create the AccountMap component responsible for displaying the accounts on a map.
Leaflet is a popular open-source JavaScript library for mobile-friendly interactive maps.
Download the latest stable version of leaflet here (0.7.3 at the time of this writing).
In Setup, go to Build > Develop > Static Resources, and click New.
Specify leaflet (all lowercase) as the Name, click the Choose File button and select the leaflet zip file you just downloaded.
Click Save.
In the Developer Console, click File > New > Lightning Component. Specify AccountMap as the bundle name and click Submit.
Implement the Component as follows:
<aura:component>

    <aura:attribute name="map" type="Object"/>

    <ltng:require styles="/resource/leaflet/leaflet.css" />
    <ltng:require scripts="/resource/leaflet/leaflet.js"
             afterScriptsLoaded="{!c.jsLoaded}" />

    <div id="map"></div>

</aura:component>
map attribute is defined to hold a reference to Leaflet map object. You create that object in the component's controller below.ltng:require styles="" allows you to load external stylesheets available in static resources.ltng:require scripts="" allows you to load external JavaScript files available in static resources.afterScriptsLoaded allows you to register an event handler that will automatically be called when the external style sheet or JavaScript file is loaded.map div is the container where Leaflet will load the map tiles.Click File > Save to save the component.
Click CONTROLLER (upper right corner of the code editor), and implement the controller as follows:
({
    jsLoaded: function(component, event, helper) {

        setTimeout(function() {
            var map = L.map('map', {zoomControl: false})
                        .setView([37.784173, -122.401557], 14);
            L.tileLayer('https://server.arcgisonline.com/ArcGIS/rest/services/World_Street_Map/MapServer/tile/{z}/{y}/{x}',
                {
                    attribution: 'Tiles © Esri'
                }).addTo(map);
            component.set("v.map", map);
        });
    }
})
component.set("v.map", map); is used to store the Leaflet map object in a component attribute so that it can later be accessed by other controller functions.Click File > Save to save the controller.
Click STYLE (upper right corner of the code editor), and implement the following style:
.THIS {
    width: 100%;
    height: 100%;
}
.THIS refers to the component's root level (and only) div element.Click File > Save to save the styles.
In the developer console, go back to the AccountLocator component.
If you don't see the tab in the developer console, click File > Open Lightning Resources in the Developer Console menu, select AccountLocator > COMPONENT in the dialog, and click the Open Selected button.
Replace the AccountMap placeholder with the actual component:
<aura:component implements="force:appHostable">

    <div>
        <div>
            <c:AccountMap />
        </div>

        <div>
            <c:AccountList />
        </div>
    </div>

</aura:component>
Click File > Save to save the component.
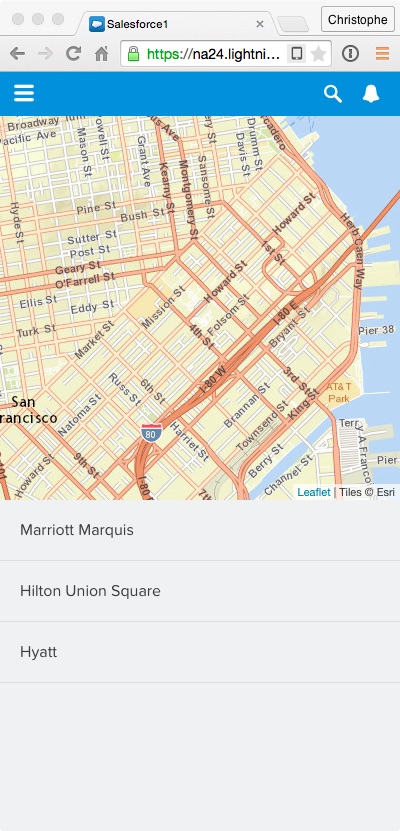
Go back to the Salesforce1 app and reload Account Locator from the menu to see the changes: