In this module, you deploy a Node.js application to Heroku using the Heroku button. You define a Canvas application to integrate the Node.js application in Salesforce, and you add the Canvas application to the Contact Page Layout.
In Setup, click Build > Create > Apps
In the Connected Apps section, click New, and define the Connected App as follows:
Click Save
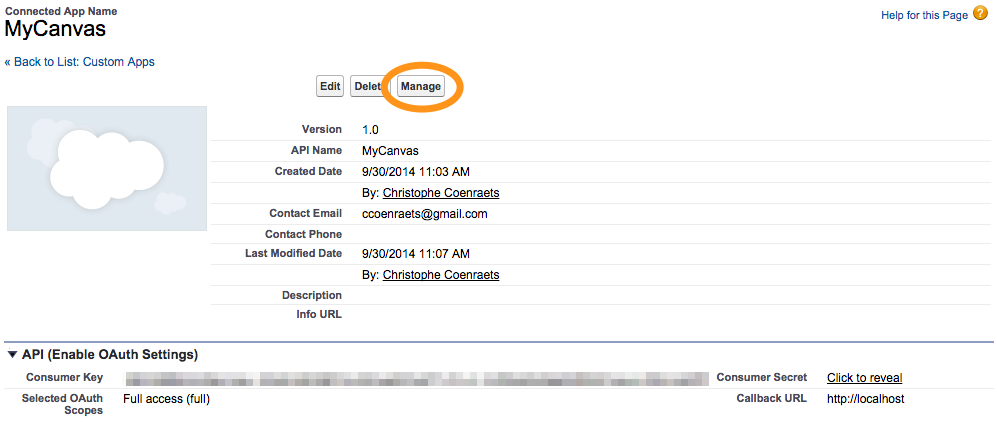
On the Connected App details page, click the Click to reveal link next to Consumer Secret, and copy your secret to your clipboard. You will need it in step 4.

On the Connected App details page, click the Manage button
Click Edit
For Permitted Users, select Admin approved users are pre-authorized
Click Save
Click Manage Profiles
Check System Administrator
Click Save
You can skip this step if you already have a Heroku account.
Open a browser and access the following URL:
Enter an email address you have access to at this time (you will need to open an activation email) and click Signup
Check your email. You will receive an activation email for your Heroku account.
Click the link in the activation email. Enter your new password information, and click Save.
Access the following GitHub repository:
Click the server.js file and examine the code:
The server defines a /signedrequest endpoint configured to respond to POST requests. This is the endpoint you specified in the Canvas parameters of your Connected App. When loading your Canvas app, your Salesforce instance will post encoded data to that endpoint including contextual information (logged in user, current object, ...), and an authenticated session id that your app can use to make API calls to your Salesforce instance.
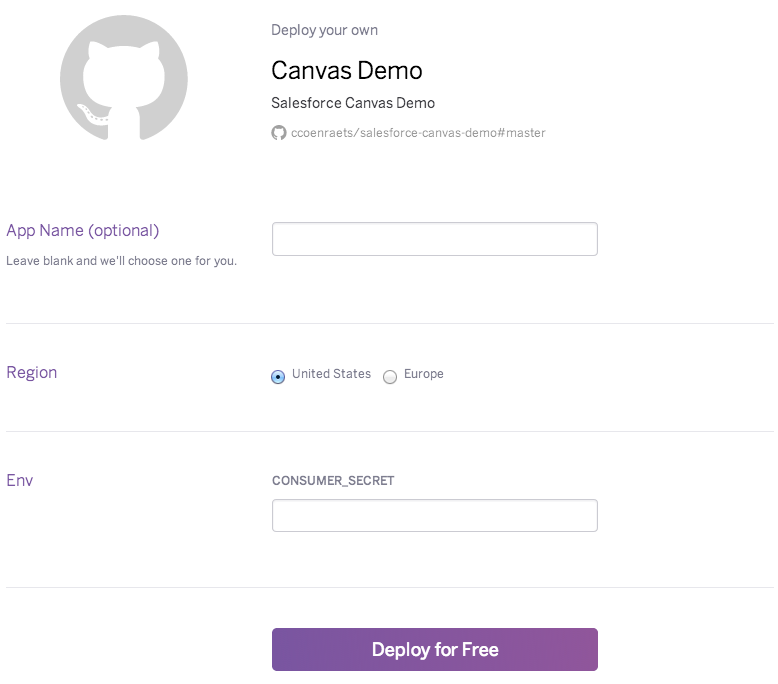
Go back to the repository home page and click the Deploy to Heroku button
In Salesforce, go back to your Connected App and adjust the URLs based on your Heroku app name:
Replace my-canvas with your own app name.
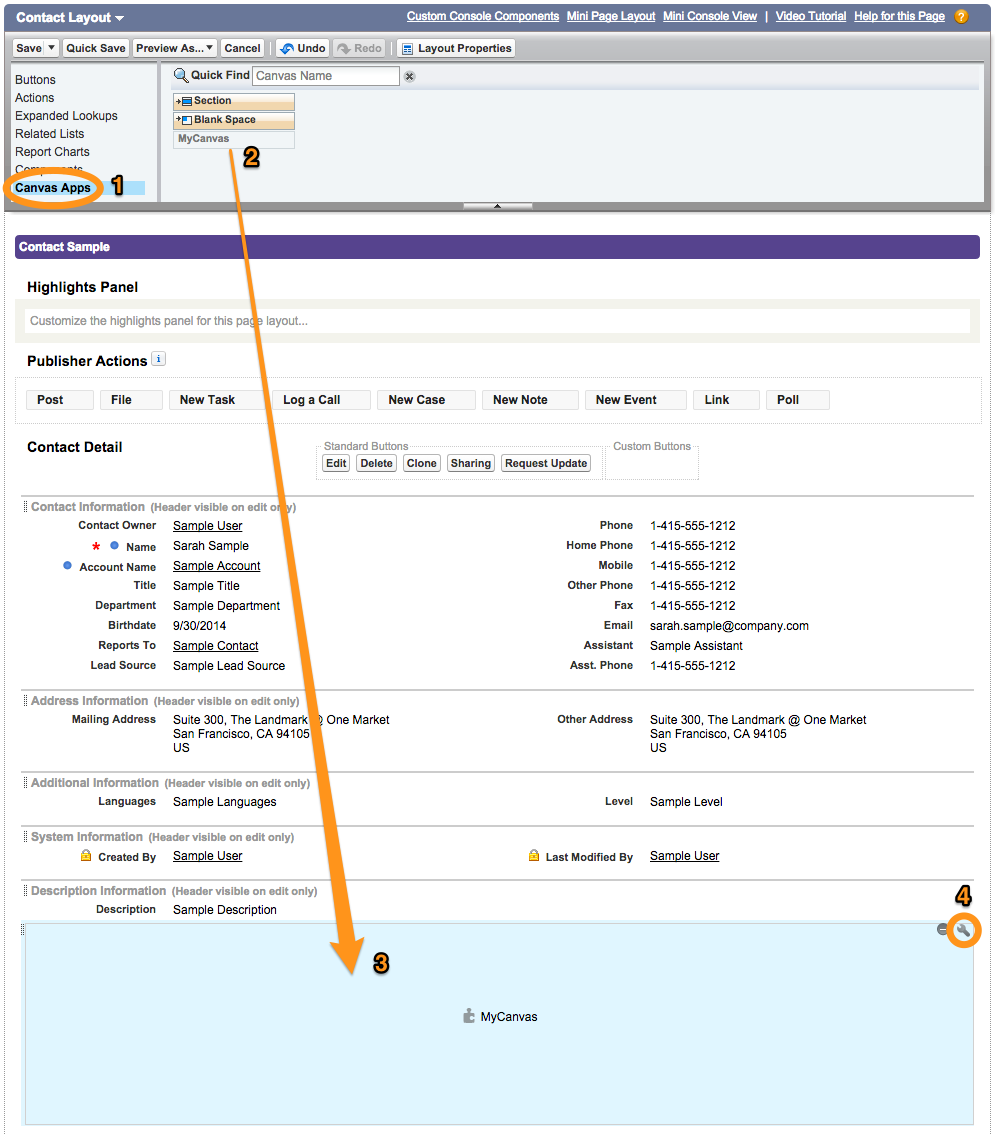
In Setup mode, select Build > Customize > Contacts > Page Layouts
Click Edit next to Contact Layout
Select Canvas Apps in the upper left corner, drag MyCanvas, and drop it immediately after the Description field.
Mouse over the Canvas in the layout, click the wrench in the upper right corner, specify 550 for the Canvas Height, and click OK.
Click Save (upper left corner) to save the layout
Access a Contact
The Canvas application should appear in the middle of the page layout
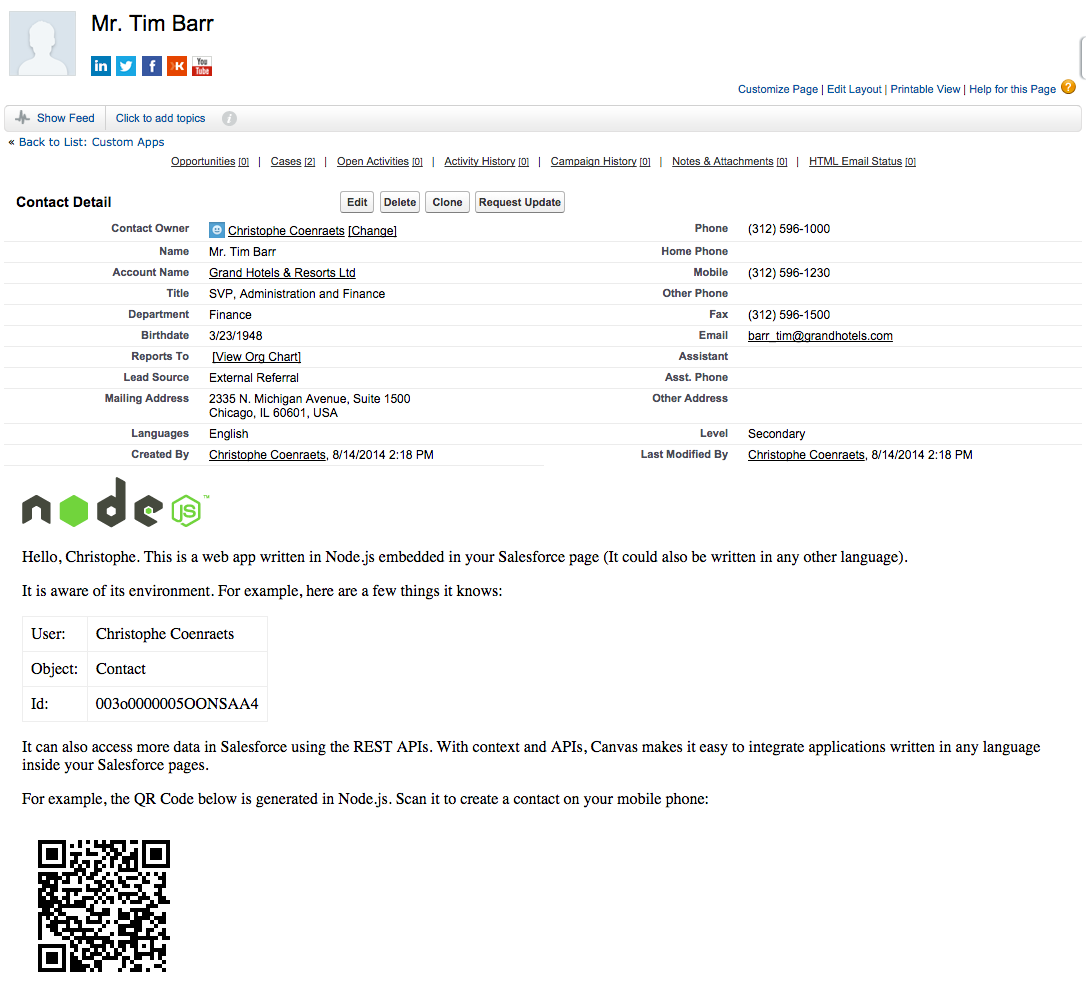
Scan the QR code with your mobile phone to create a new contact entry